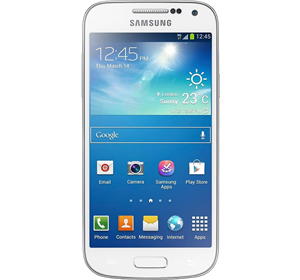
Samsung Galaxy S4 Mini

Popular Topics
Follow these steps to get started with your device
Get startedSet up email
Please choose your email provider:
| |||||||||||||||||||||||||||||||||||||||||||||||||
| 1. | From the Home screen tap the Apps menu item. | ||||||||||||||||||||||||||||||||||||||||||||||||
| 2. | Scroll left and then tap the Settings menu item. | ||||||||||||||||||||||||||||||||||||||||||||||||
| 3. | Tap the Accounts tab. | ||||||||||||||||||||||||||||||||||||||||||||||||
| 4. | Tap the Add account menu item. | ||||||||||||||||||||||||||||||||||||||||||||||||
| 5. | Tap the Email menu item. | ||||||||||||||||||||||||||||||||||||||||||||||||
| 6. | Enter your Email address and password. | ||||||||||||||||||||||||||||||||||||||||||||||||
| 7. | Tap the Manual setup button. If you would like to set up a POP3 email account: | ||||||||||||||||||||||||||||||||||||||||||||||||
| 1. | Tap the POP3 account button. | ||||||||||||||||||||||||||||||||||||||||||||||||
| 2. | On this 'Incoming server settings' screen, enter your details as above and then tap the Next button. | ||||||||||||||||||||||||||||||||||||||||||||||||
| 3. | On this 'Outgoing server settings' screen, enter your details as above and then tap the Next button. | ||||||||||||||||||||||||||||||||||||||||||||||||
| 4. | Amend the account options as required and then tap the Next button. | ||||||||||||||||||||||||||||||||||||||||||||||||
| 5. | Give your email account a name and then tap the Done button. If you would like to set up a IMAP email account: | ||||||||||||||||||||||||||||||||||||||||||||||||
| 1. | Tap the IMAP account button. | ||||||||||||||||||||||||||||||||||||||||||||||||
| 2. | On this 'Incoming server settings' screen, enter your details as above and then tap the Next button. | ||||||||||||||||||||||||||||||||||||||||||||||||
| 3. | On this 'Outgoing server settings' screen, enter your details as above and then tap the Next button. | ||||||||||||||||||||||||||||||||||||||||||||||||
| 4. | Amend the account options as required and then tap the Next button. | ||||||||||||||||||||||||||||||||||||||||||||||||
| 5. | Give your email account a name and then tap the Done button. If you would like to set up a Microsoft Exchange ActiveSync email account: | ||||||||||||||||||||||||||||||||||||||||||||||||
| 1. | Tap the Microsoft Exchange ActiveSync button. | ||||||||||||||||||||||||||||||||||||||||||||||||
| 2. | On this 'Exchange server settings' screen, enter your details as above and then tap the Next button. | ||||||||||||||||||||||||||||||||||||||||||||||||
| 3. | Read the 'Activation' text and when happy tap the OK button. | ||||||||||||||||||||||||||||||||||||||||||||||||
| 4. | Amend the account options as required and then tap the Next button. | ||||||||||||||||||||||||||||||||||||||||||||||||
| 5. | Give your email account a name and then tap the Done button. |
How useful was this page?
Thanks for your feedback, we have recorded your rating of this guide. You can give any other feedback by using the form below.
Thank you for your feedback
Thank you for taking the time to give us feedback. All feedback helps us continue to provide the best online support for our customers and is very much appreciated.